
07 Aug, 2023
How cool is this? Take a photo of a block of tabular data on your mobile phone (crop it if you need to). Email it to your PC and Insert the data directly into Excel. Excel will basically perform OCR (Optical Character Recognition) on the photo and insert it into your workbook.
 A Photo of some data we want entered in Excel
1. Use your mobile phone or something like the “Snipping Tool” (mentioned in a previous mailout) to take a photo/snapshot of the data you need
2. Email the photo from your mobile to PC if need be and save it
3. Start Excel and create a new Workbook
4. Select Data > From Picture > Picture from File…

Using the Data Tab to Insert a Photo
5. Navigate to the File, Select it and Choose Insert
6. Excel will start Analysing the data (performing OCR)
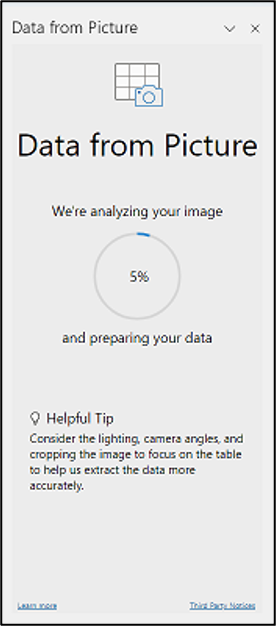 Performing OCR
7. Excel will notify you of anything it thinks may be wrong and give you the opportunity to fix it before importing (use the review button)
8. NOTE: In the example above Excel thought there may have been a few decimal places. Hitting the review button and using the forward “>” button will let you remove the decimal places and make any changes.
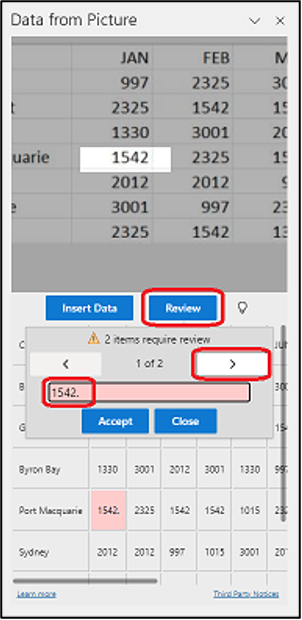 Final Editing before Importing
9. Once any required changes are made. Select Accept Then Close and then Insert Data Insert Data.
10. The data is now inserted successfully into Excel with no typing involved!
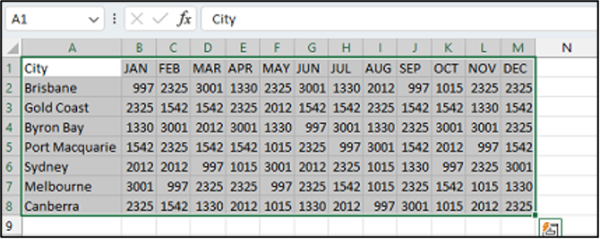 Inserted data with no typing 😊
Once this is done you need to check all the data (like OCR its not an exact science) and adjust column widths, apply formatting and so on, but it’s still a great timesaver (we teach lots of these in our various Excel courses).
NOTE: This feature only works on the later versions of Excel like Excel 365. If you can’t find Data > From Picture you are probably using an older version of Excel ☹
If you would like to try this right now using the file I used above, click on this link: LINK TO FILE
Once opened in your web browser right click in the centre of the image and choose Save Image As and save it to your desktop.
Start Excel and follow the steps above. Hope you enjoy this cool little Excel tip. When you are ready for hundreds more tips in a single day, you are probably ready for an Excel Refresher, Upgrade or the next level in your learning.
Ideally, aim for 2-3 courses each year just to keep on top of things, keep your skills fine tuned and learn new features. 😊
07 Aug, 2023
26 Oct, 2023

25 Sep, 2023


01 Apr, 2023